Zendesk (Old version)
Create a bi-directional connection between issues in Slack and tickets raised in Zendesk
Overview
This Thena <> Zendesk integration enables real-time notifications in Slack for Zendesk tickets, making it easier to track and respond to customer issues. Teams can collaborate more effectively on support tickets directly from Slack, without needing to switch between applications.
Get Started
- Generate an API Token
- Setup the Zendesk credentials in The Thena Web App
- Create a Zendesk Webhook and Trigger for Ticket Comments
- Create a Zendesk Webhook and Trigger for Ticket Status
Generate an API Token
Generate a new API token. Follow the steps listed in the Zendesk documentation here. We do not recommend using an existing token as that can lead to issues if the token is ever removed.
Setup the Zendesk credentials in the Thena Web App
Go to the The Thena Web App and click on 'Add Integration' under Zendesk. You should see the following modal (below)
- The Username will be your login email that you use to access Zendesk.
- Retrieve the token from the Zendesk API Token mentioned here.
- The Base URL will follow the format of:
https://[workspace name].zendesk.com/api/v2. If your workspace is namedacmeit will be:https://acme.zendesk.com/api/v2 - Click on "Test Connection".
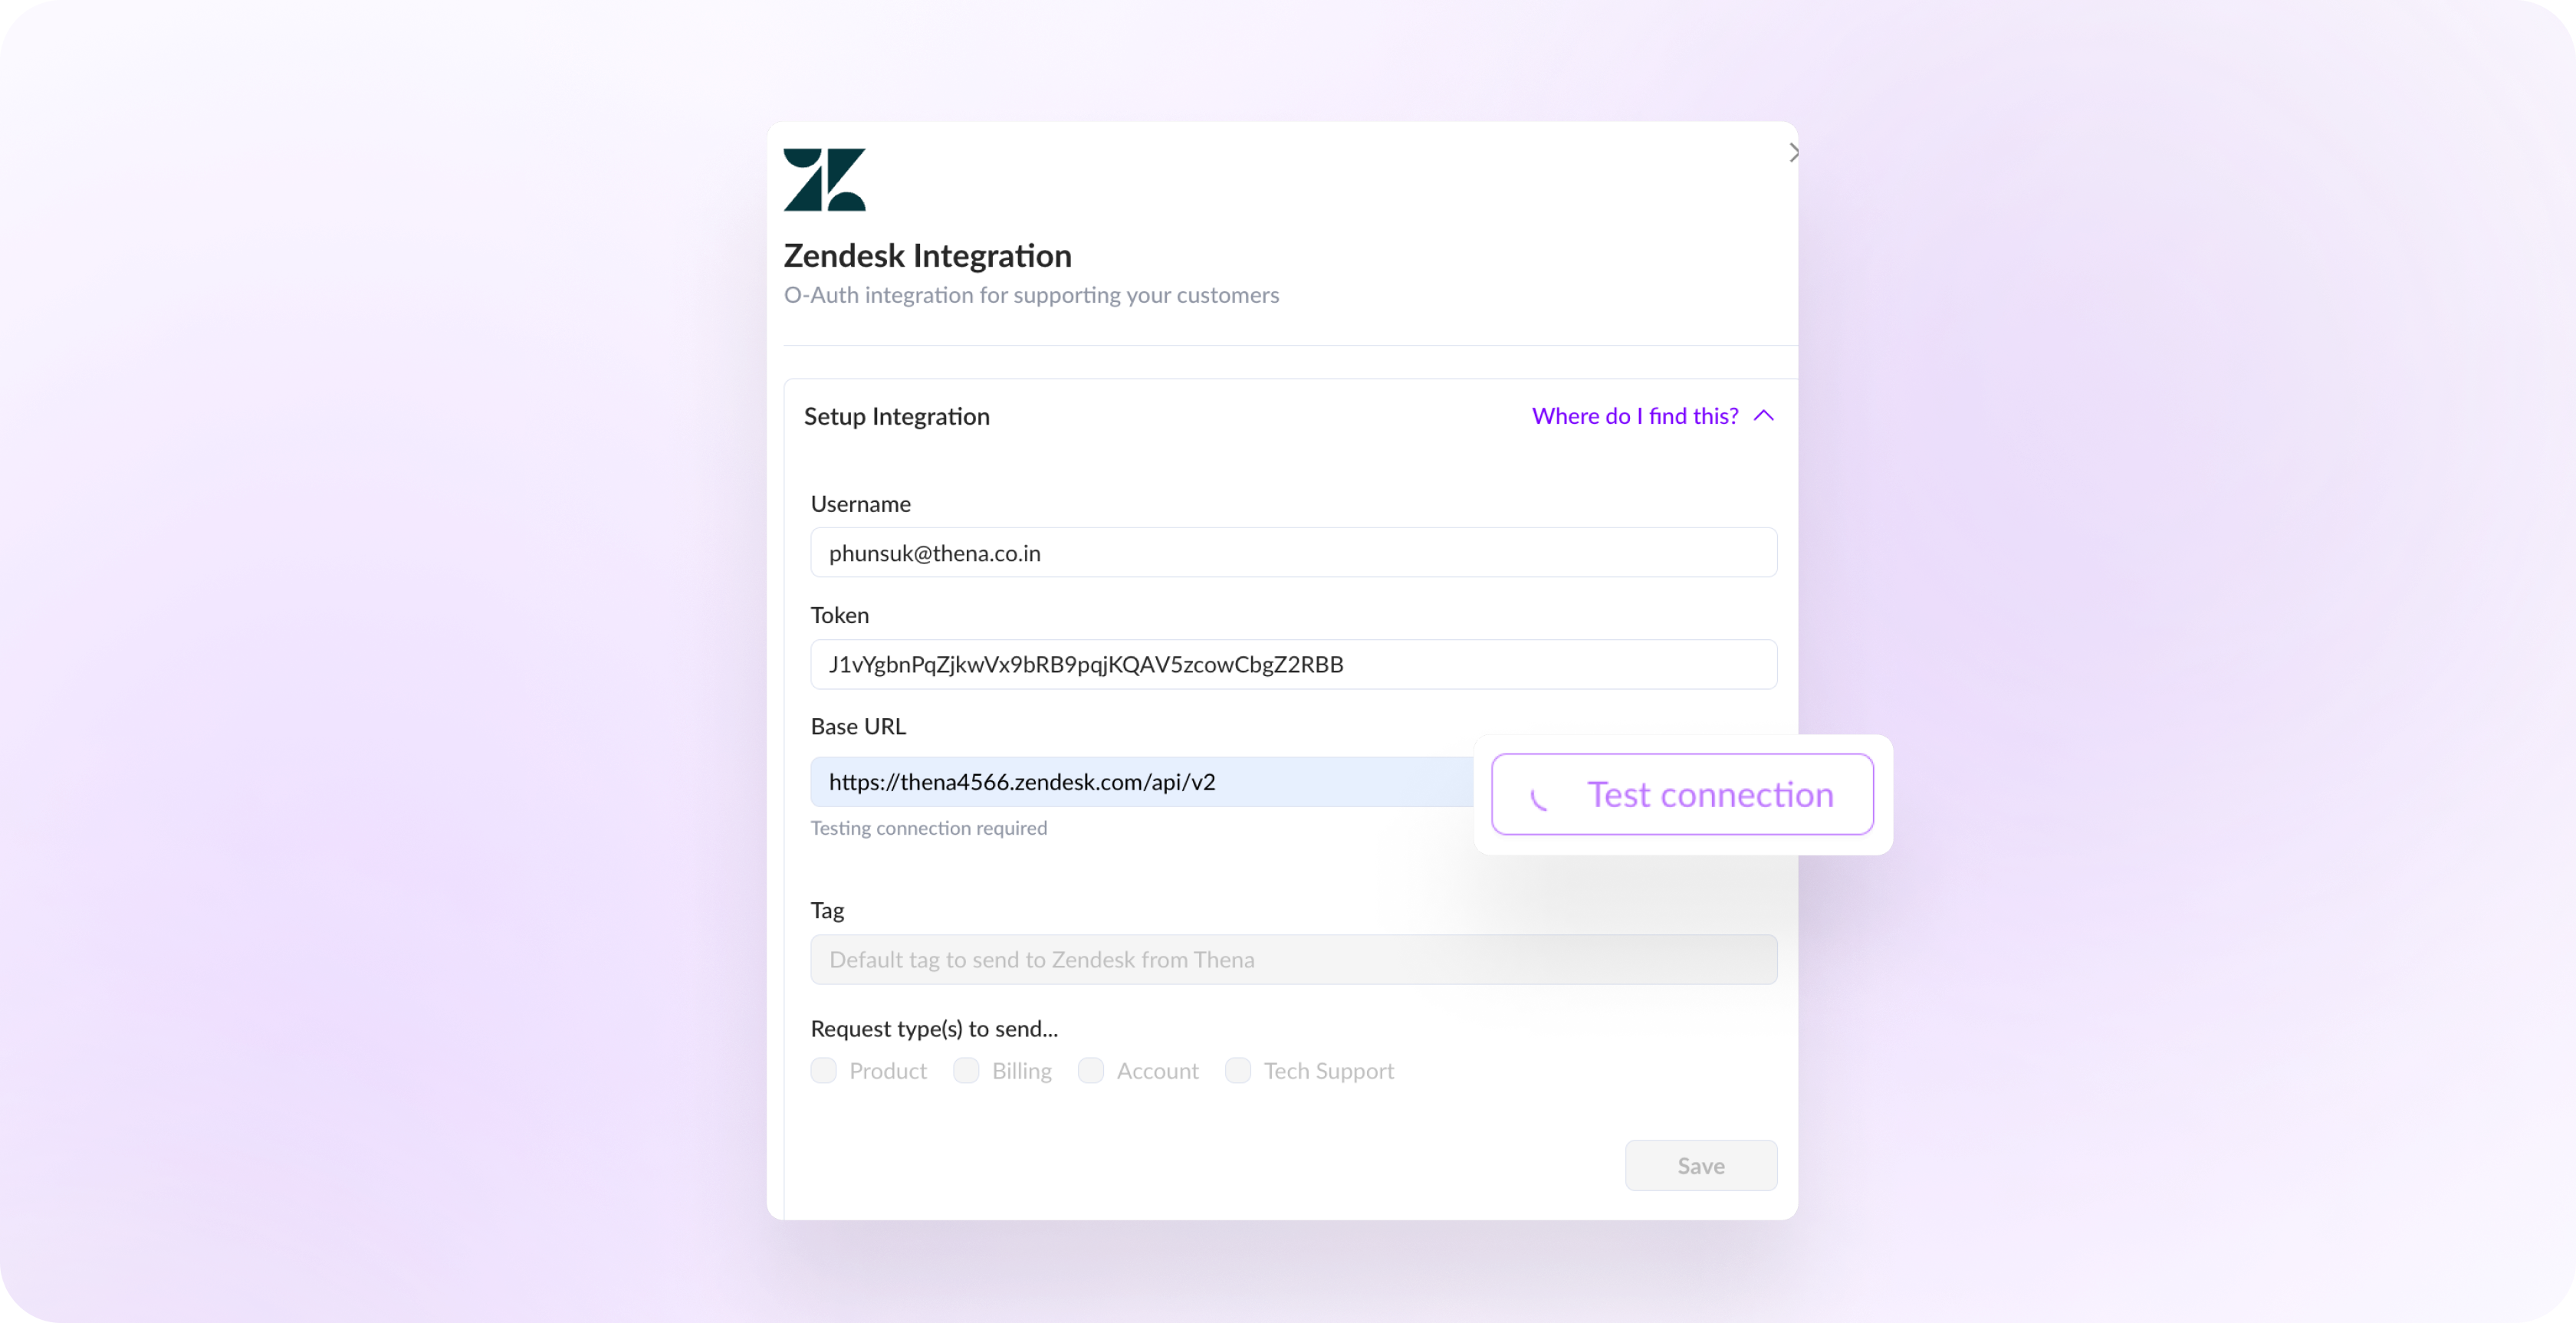
- Once your connection is successfully completed, click "Save" to proceed with creating tickets.
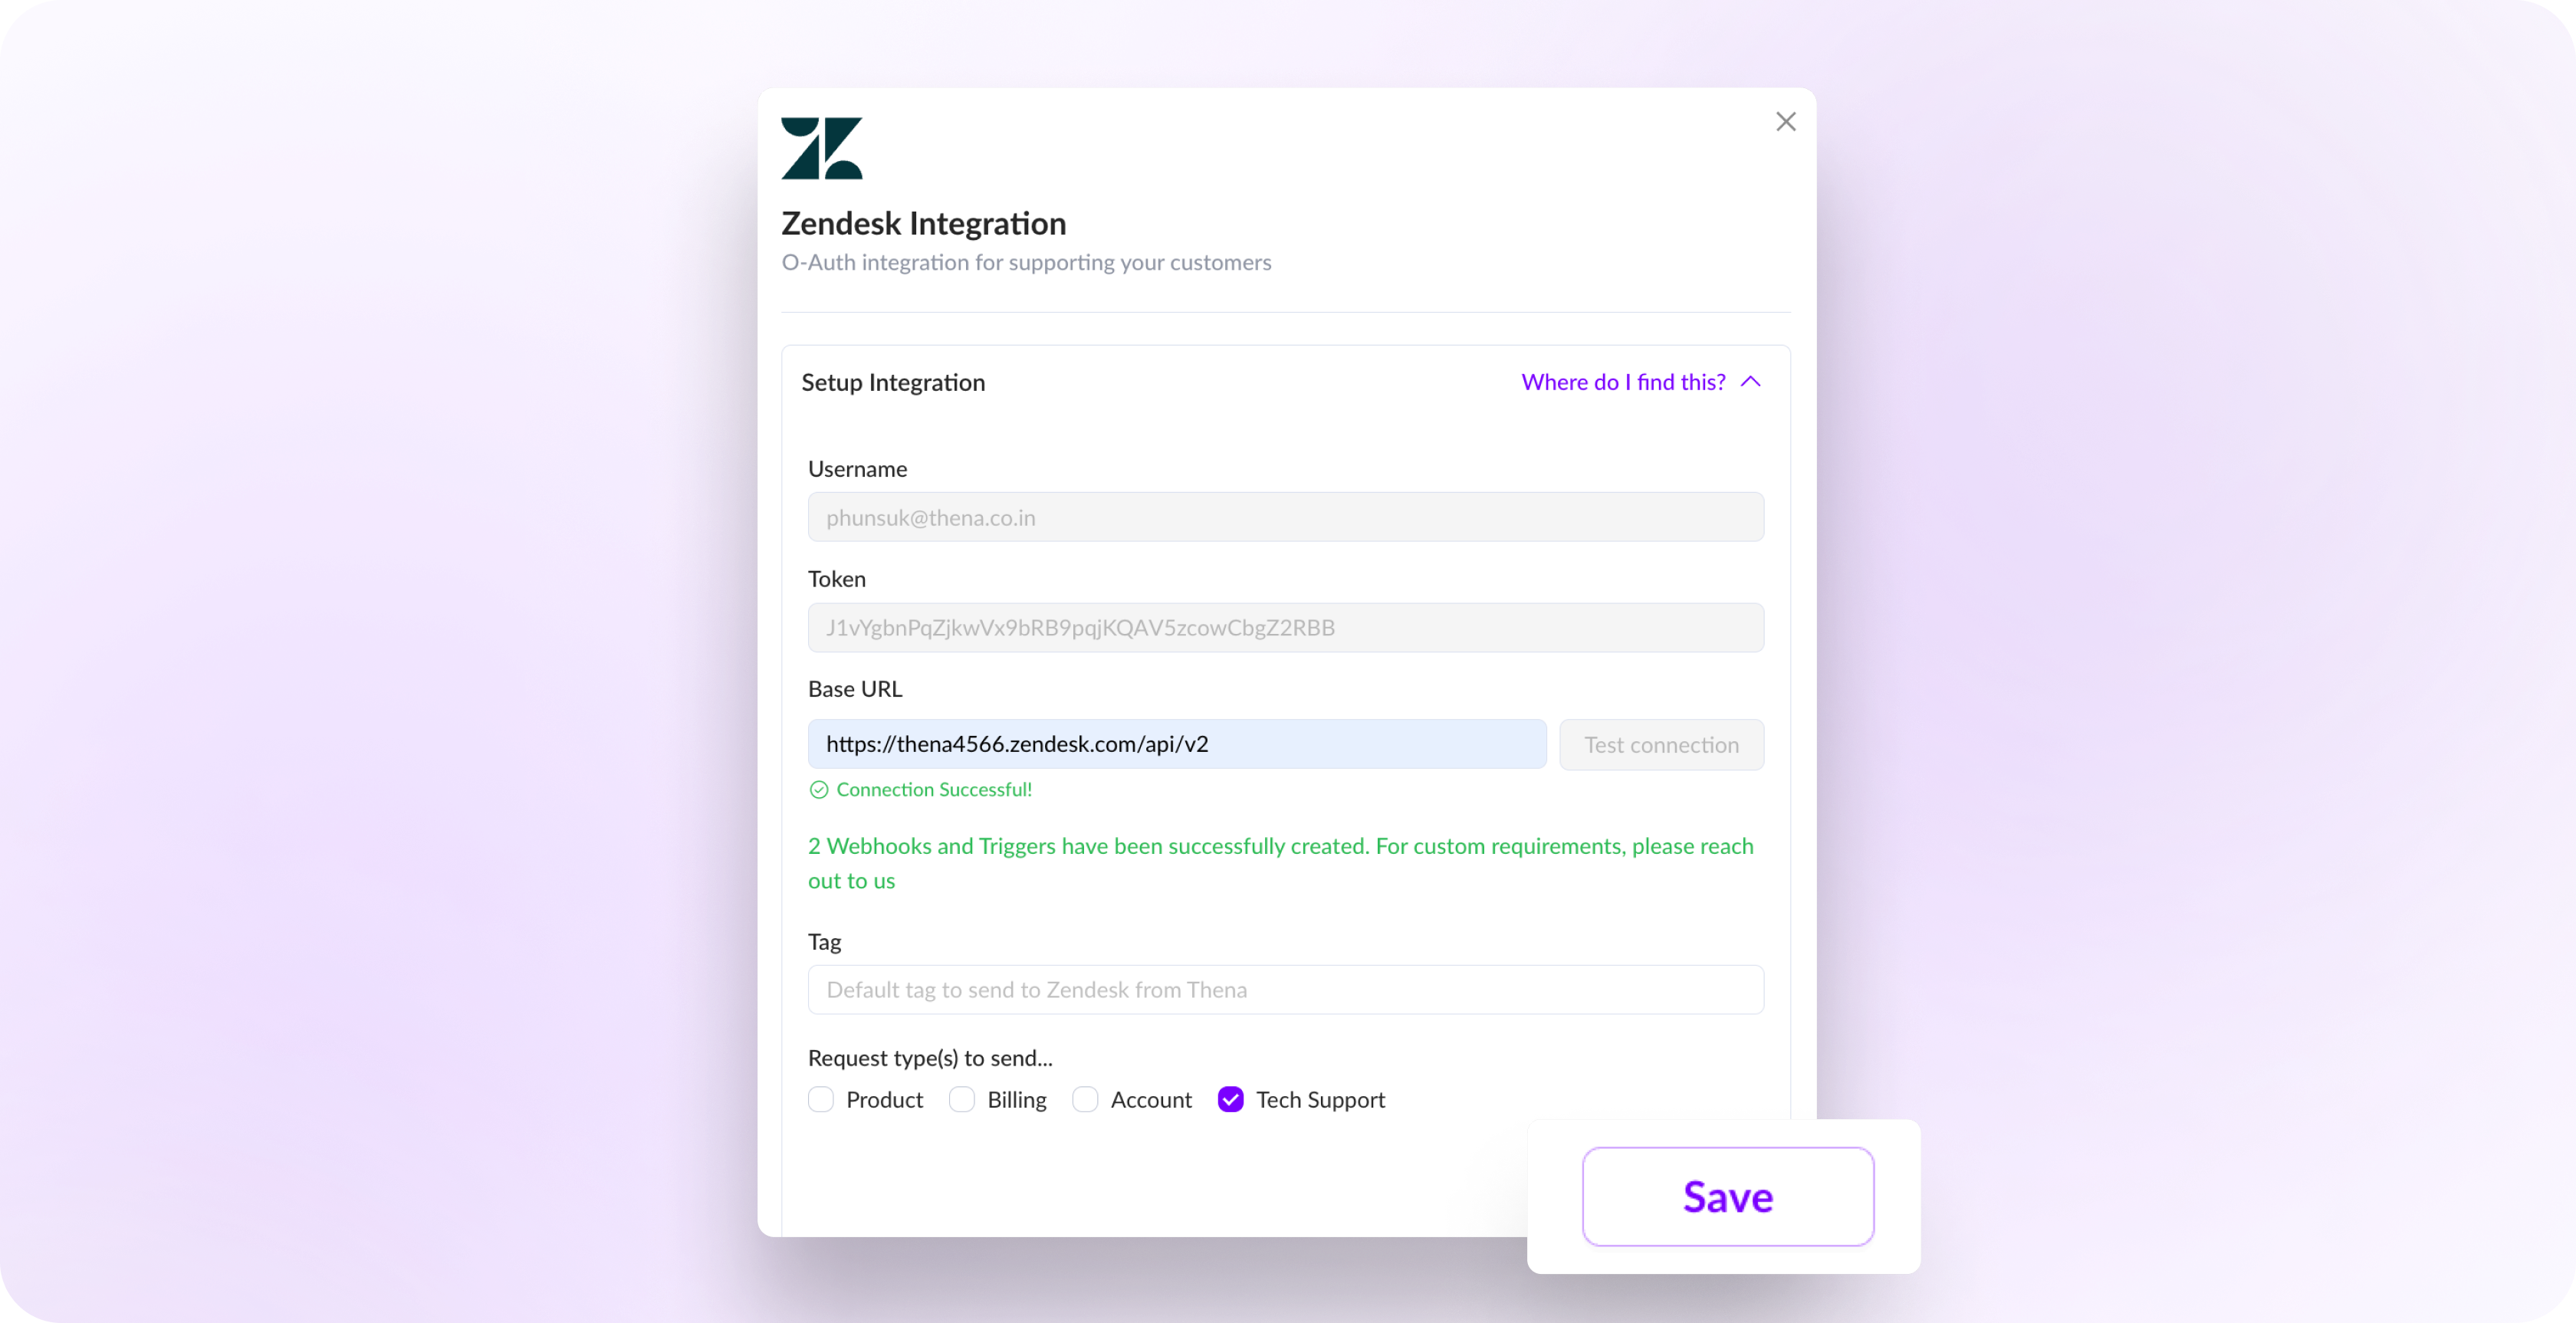
After you get a 'Connection Succeeded', the first ticket can be created.
We have created the relevant Webhooks and Triggers on your behalf, to ensure a smooth bi-directional flow.
Features
Zendesk <> Thena Flows
Functional Flows
The following are the functional flows supported for Zendesk via Thena:
| Functionality | Slack --> Zendesk | Thena WebApp --> Zendesk | Zendesk --> Slack (If ticket created using Thena) |
|---|---|---|---|
| Ticket Creation (Without any required fields for Ticket creation) | ✅ | ✅ | NA |
| Ticket Creation (With required fields for Ticket creation) | ✅ | 🔴 | NA |
| Ticket Closure (Without required fields for Closure) | ✅ | ✅ | ✅ |
| Ticket Closure (With required fields for Closure) | 🔴 | 🔴 | ✅ |
| Status Sync | ✅ | ✅ | ✅ |
| Assignee Mapping | 🔴 | 🔴 | 🔴 |
| Priority Sync | ✅ | ✅ | ✅ |
Rich Text Formatting
The following rich-text formatting options are available with Thena's connector with Zendesk
| Functionality | Slack --> Zendesk | Zendesk --> Slack | Comments |
|---|---|---|---|
| Plain Text | ✅ | ✅ | |
| Hyperlinking | ✅ | 🟡 | Zendesk webhooks do not support HTML. More here |
| Files | ✅ (till 10 MB) | ✅ ( till 30 MB | Files in Zendesk are through Thena's S3 bucket (Contact us for configuring your S3 bucket |
| Video | 🔴 | ✅ | Send Video as a file through Slack |
| Code** **Block | ✅ | 🟡 | Code block is received as : ``` ''' |
| Rich Text | 🟡 | 🟡 | Formatting for Bold and Italics is limited |
File size exceeding limits
In the scenario, a file (which is greater than
10MBon Slack and30 MBon Zendesk) is added to a comment/message respectively, the message would not be posted to the destination.
Workflow for Re-opening tickets
Zendesk's "Solved" vs. "Closed" states involve a configurable duration during which a "solved" ticket can be reopened upon customer response. If this duration has passed, the ticket moves to "Closed, Zendesk does not allow reopening of a closed ticket. Instead, we create a follow-up ticket.
For additional information, please refer to Zendesk Automation.
Before attempting to re-open a ticket, we verify it's status in Zendesk. If it is closed, we allow Zendesk to create the follow-up ticket and utilize this information in the new message posted on the channel.
Use Case:
- Agent solves a ticket and marks it as closed.
- The customer returns after a few days (or hours) to ask additional questions on Slack.
- The ticket in Zendesk remains closed, disrupting bi-directional sync.
The agent (in Zendesk) is unaware of the customer's follow-up, potentially leading to an SLA breach.
Functionality:
We facilitate both re-opening a ticket and creating a new ticket when a customer responds to a closed Zendesk ticket.
Re-opening a Ticket:
- After the customer responds, we attempt to re-open the ticket, moving it to "In Progress," provided on the Zendesk ticket being marked as solved.
- When a Zendesk ticket is reopened, the default status is Open in Zendesk. However, this can be configured to default Zendesk statuses, you can reach out to your account manager for the same.
New follow-up Ticket
If re-opening is not possible due to Zendesk limitations or the ticket being closed in Zendesk.
- We create a new follow-up Zendesk ticket.
When sending the ticket attachment message in the Slack thread, we update the text from "Zendesk Case ID: 2234" to "Follow up Zendesk Case ID: 2235."
FAQ
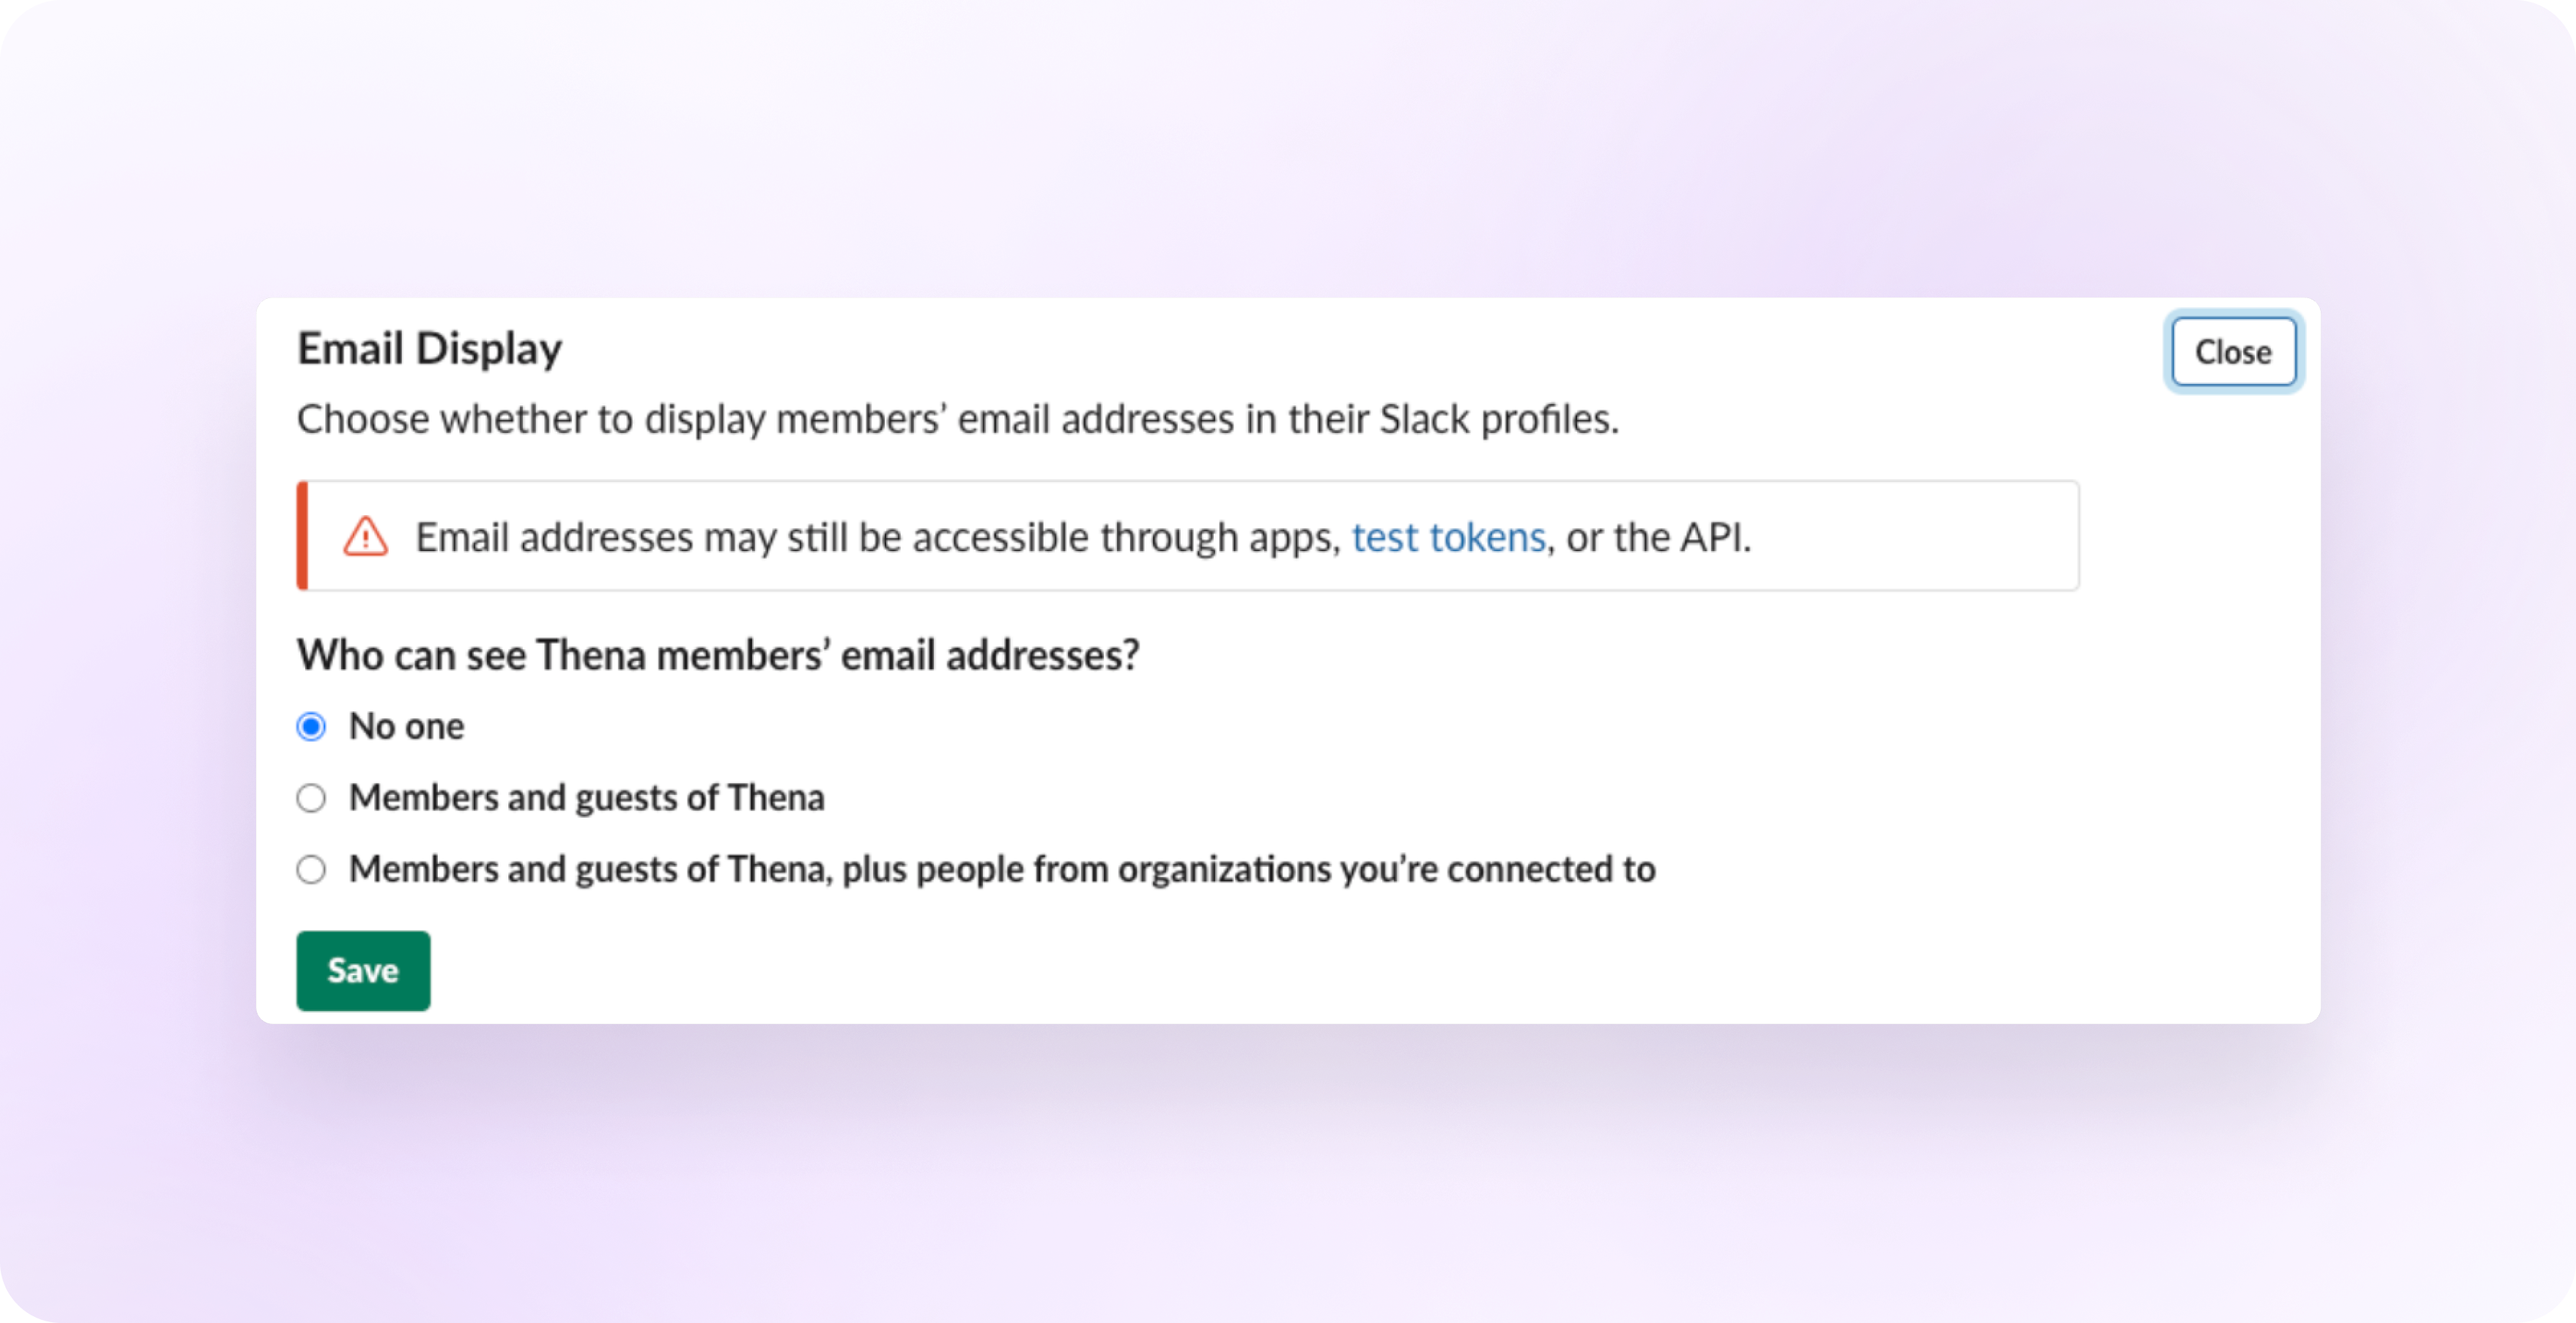
Why are some of my customer requests showing up as requested by the Zendesk admin?
Each Slack workspace has the ability to choose whether or not to display a member's email address. If the workspace has set this to No one, then Slack does not provide the email address of your customers through its API (image below)
The email is critical for our Zendesk integration to work. This is because we sync contacts between Slack and Zendesk using the email object. If the email id is not provided by Slack, Thena will automatically assign it to the Zendesk admin that setup the Thena integration.
Why are responses by my agent from Zendesk showing up as they are sent as Thena on Slack?
Thena whitelables the responses with the agent name and profile picture. If your agent's response is being delivered on Slack with the Thena icon and name, one of the following is the root cause:
- Agent user does NOT exists on Slack
- Agent has a different email on Slack vs that on Zendesk (case sensitive)
What happens if a ticket is raised on behalf of a user that does not exist on Zendesk?
In this scenario, Thena will automatically create a new user in Zendesk.
Why does the 'Requested By' dropdown show up when I am creating a ticket
In a private channel, we do not pull the user data to cater to privacy. That is why, you are asked to explicitly add the requestor in order to send it to Zendesk. This is then used to map and show the relevant user in Zendesk.
Does Priority sync work for the Zendesk integration?
Yes - We sync both Status and Priority bi-directionally.
Will an OAuth for Zendesk be available?
Yes - we are currently working on having an O-Auth enabled integration with Zendesk. Once completed, you will no longer need to do a one time setup of Webhooks and associated Triggers in Zendesk.
Should I create a new Admin user in Zendesk for the integration?
This is optional - You can continue to use an existing admin account, or create a new user.
What happens if I create the integration in Zendesk as an Agent (and not as an Admin)?
If the integration is setup as an agent, then the Zendesk API ends up passing a lot of customer messages as a message from the Zendesk Thena admin, instead of mapping the message correctly.
Why am I unable to receive hyperlinked text in Slack when I send a message through Zendesk?
This is due to the limitations with the Zendesk Webhooks which do not support complete HTML.
As an alternative, you can share the exact link instead of hyper linking Eg: https://example.com/ instead of Example
Am I able to track the ticketing volume from Thena/Slack in Zendesk?
Yes, you can enable what's known as a default tag to send to Zendesk. This can be something like thenaSlackRequest. All requests that originate from Slack will have the default tag applied. To request default tagging, please reach out to the Thena team.
Will Internal notes in Zendesk be visible on Slack?
No - Internal notes are viewed as collaboration within the Support team. As a result, we do not show the internal notes to the customer.
What happens if the user who's message is being converted into a ticket is suspended in Zendesk
When converting a Slack message to a Zendesk ticket, if the user who sent theoriginal message in Slack is marked as suspended in Zendesk, we try to un-suspend the user in Zendesk and if Zendesk does not allow un-suspending the users, we fallback to create the ticket using the admin user who had integrated Thena with Zendesk.
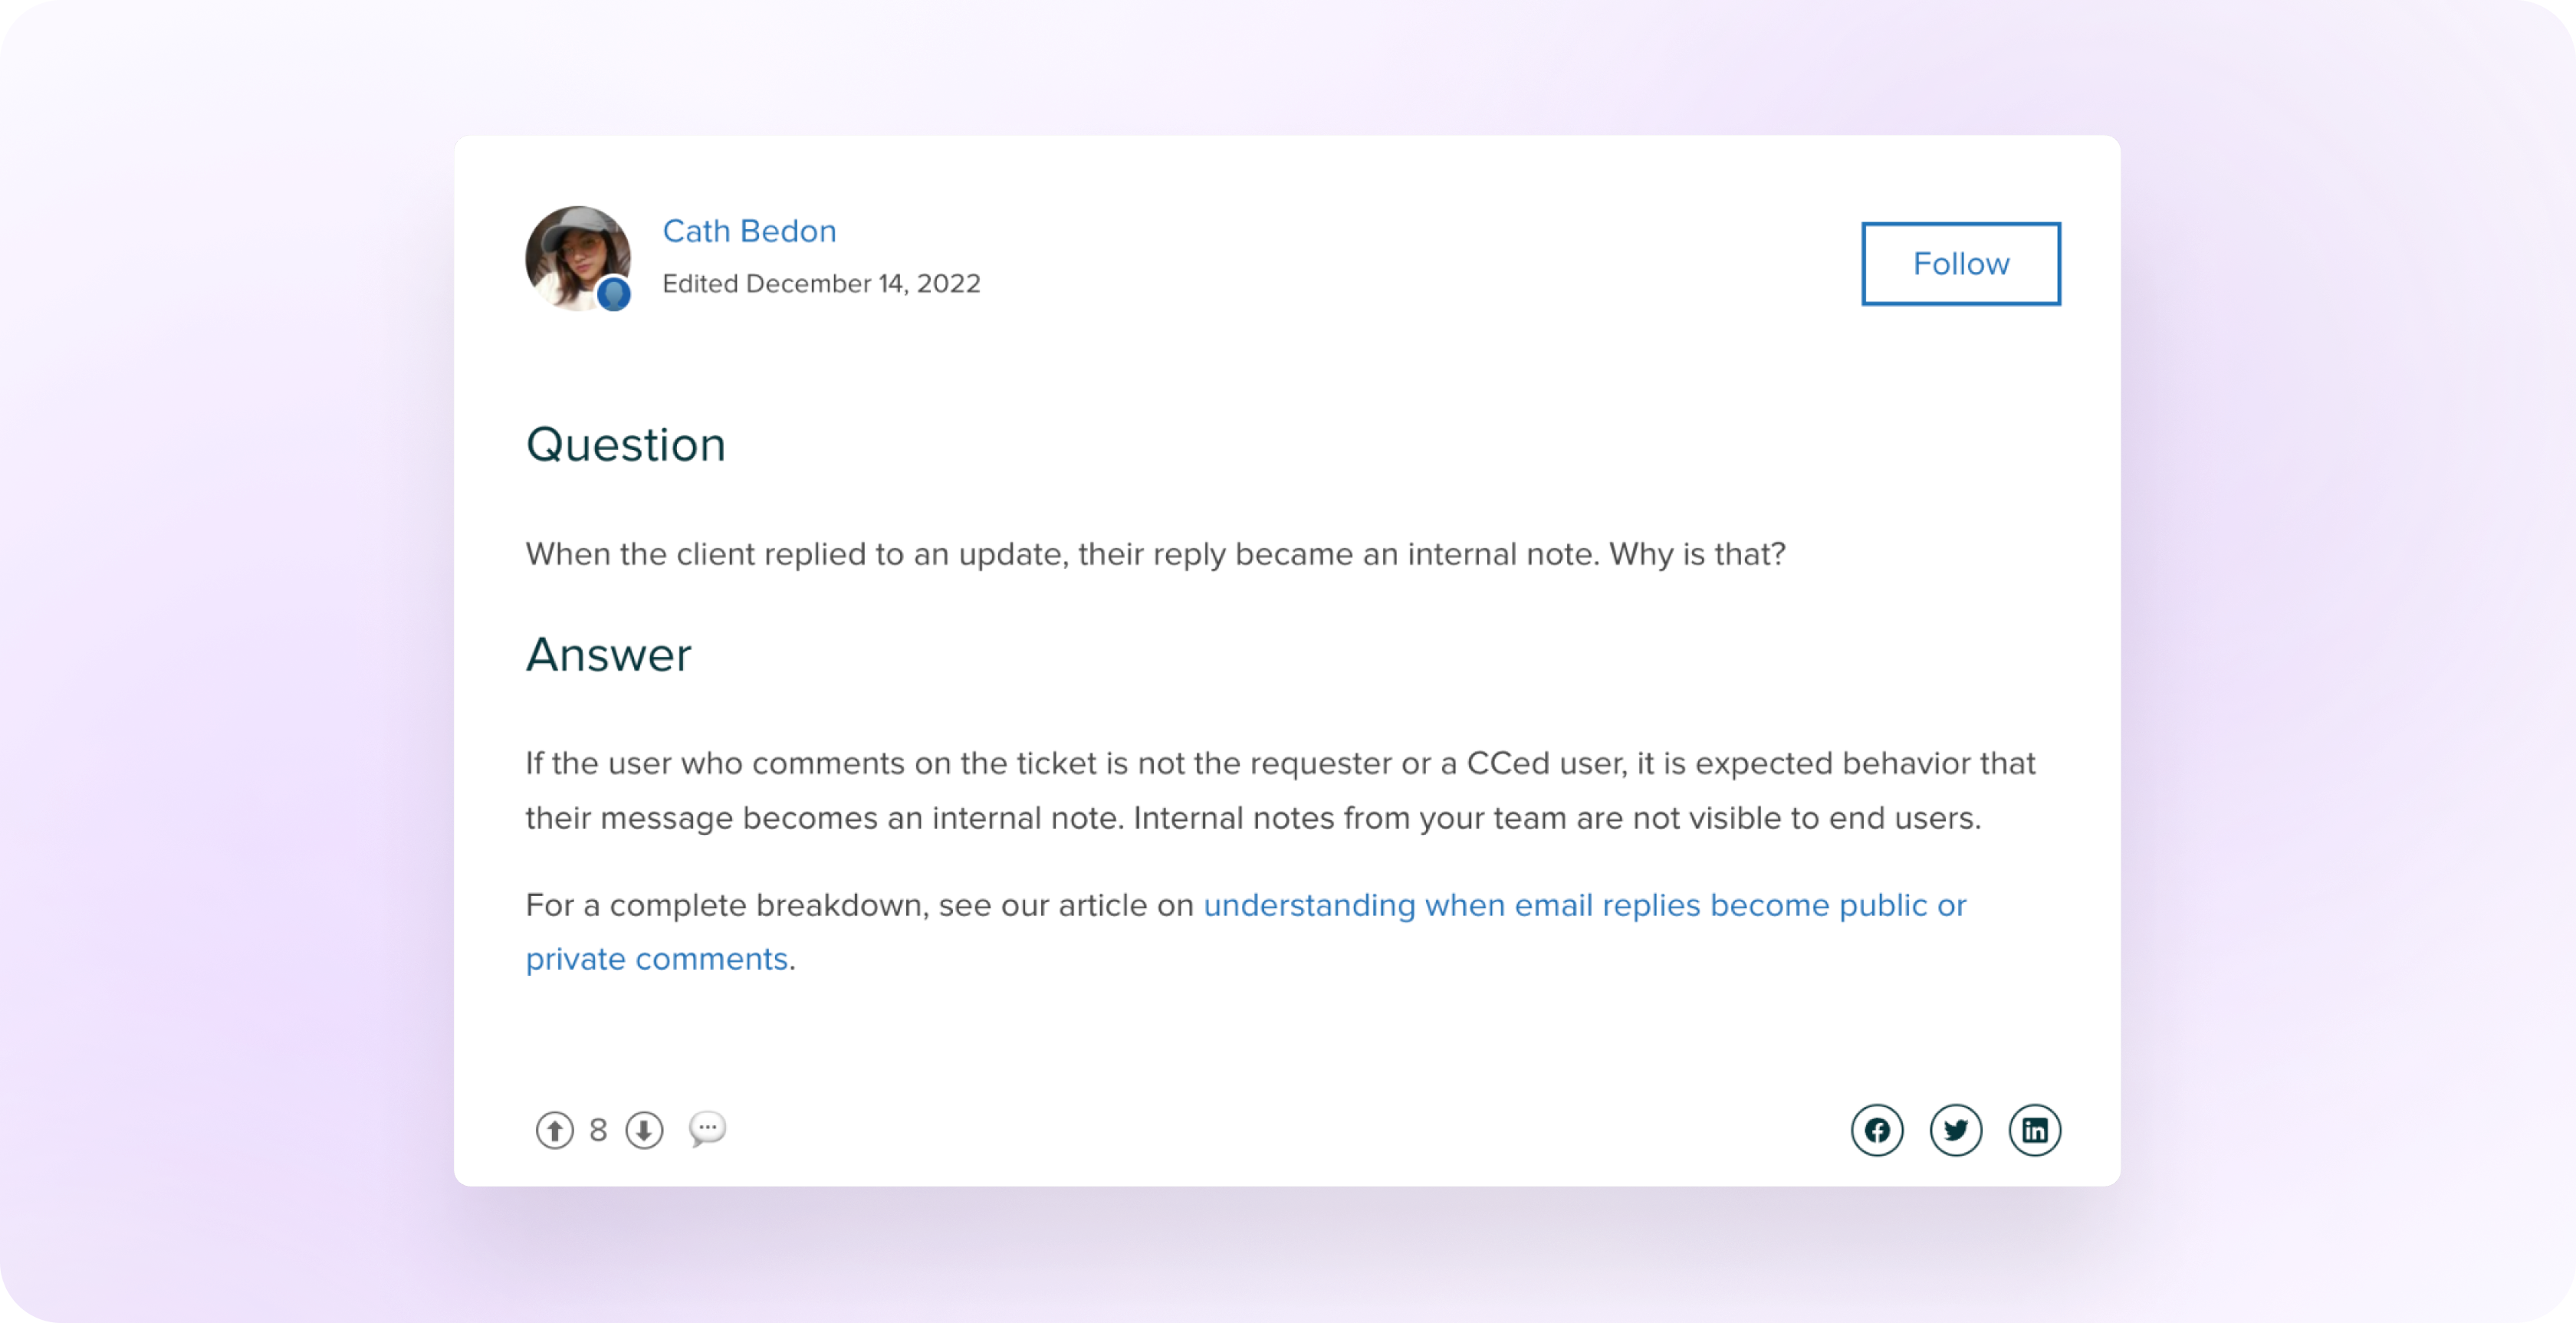
Why did a reply from a fellow support agent become an internal note?
Per Zendesk's documentation below, this is an expected outcome. Link to Zendesk documentation
How do I disable emails for tickets created via Slack?
Please share the name of your tag with Thena
Please go through the steps below on Zendesk and then share this tag with us and we will configure this tag to be sent with all of your tickets.
Go to Zendesk Admin pannel --> Object and Rules --> Business Rules --> Triggers --> Notify
- Select Trigger - Notify requester and CCs of comment update
- Add a condition of tag contains non of the following: {{yourslacktag}}
What occurs when a Zendesk ticket is closed, and the customer replies to the Slack thread for a follow-up question?
Zendesk's "Solved" vs. "Closed" states involve a configurable duration during which a "solved" ticket can be reopened upon customer response. If this duration has passed, the ticket moves to "Closed, Zendesk does not allow reopening of a closed ticket. Instead, we create a follow-up ticket.
When a Zendesk ticket is closed, and the customer responds in the Slack thread with a follow-up question, we create a new ticket in Zendesk as a follow-up to previous ticket. This process continues with subsequent follow-up tickets for ongoing communication.
Here is an example of how this process works:
Let's say the Zendesk closure automation is set to two days.
A customer submits a request on Slack which initiates the creation of a Zendesk ticket (T1).
The support team resolves the issue and marks the ticket as Solved, which results in the ticket being closed due to the Zendesk automation.
After two days, the customer has a follow-up question and responds on the Slack thread. As T1 is closed, this triggers the automatic creation of a follow-up ticket (T2) in Zendesk, which is a follow up ticket to Ticket T1.
The vendor works on the follow-up ticket (T2) and marks it as solved in Zendesk, ultimately resulting in its closure due to Zendesk Automation.
If the customer responds again on the Slack thread after the closure of T2, it triggers the generation of another follow-up ticket (T3) in Zendesk. This new ticket (T3) serves as a follow-up to T2.
Can we close the Ticket using emoji?
The tickets can't be closed using Emojis.
Updated 4 months ago